Machine embroidery is a versatile and popular technique used to add intricate designs, patterns, and textures to fabric. Understanding the fundamentals of machine embroidery is crucial for mastering the art of its removal. Here’s a breakdown of the key aspects:
Table of Contents
Explanation of How Machine Embroidery Works
Machine embroidery involves stitching designs onto fabric using computerized embroidery machines. These machines are programmed to follow a specific pattern, stitching out the design using various types of stitches. The embroidery process typically involves a hoop to hold the fabric taut and a needle that moves in multiple directions to create the desired design.
Different Types of Machine Embroidery Stitches
There are several types of stitches commonly used in machine embroidery, each with its own unique appearance and purpose. Some of the most common stitches include:
- Running Stitch: This basic stitch is formed by a single line of continuous stitches, often used for outlining and adding fine details.
- Satin Stitch: A dense stitch that creates a smooth, glossy surface, commonly used for filling in shapes and creating bold, solid lines.
- Fill Stitch: Also known as a tatami stitch, this stitch is used to fill in larger areas with a solid block of color or texture.
- Stem Stitch: A decorative stitch often used for creating flowing lines and intricate details, resembling the look of hand embroidery.
- Chain Stitch: A looped stitch that creates a chain-like pattern, commonly used for outlining and adding texture.
These are just a few examples of the wide range of stitches available in machine embroidery, each offering unique effects and applications.
Importance of Choosing The Right Materials for Easy Removal
Selecting the appropriate materials for machine embroidery not only ensures successful stitching but also makes the removal process smoother. Here are some factors to consider:
- Fabric Type: Different fabrics react differently to machine embroidery and removal techniques. Some fabrics, such as cotton and linen, are more forgiving and easier to work with, while delicate fabrics like silk require extra care to avoid damage.
- Thread Type: The type of thread used in machine embroidery can affect its ease of removal. Polyester and rayon threads are commonly used due to their durability and vibrant colors, but they may be more challenging to remove compared to cotton or water-soluble threads.
- Stabilizers: Stabilizers are used to support the fabric during embroidery and can impact the removal process. Tear-away stabilizers are designed to be easily removed after stitching, while cut-away stabilizers provide more permanent support and may require more effort to remove.
Assessing The Embroidery
Before diving into the removal process, it’s essential to assess the embroidery carefully. Understanding the fabric, thread, and complexity of the design will help you choose the most appropriate removal technique and avoid potential damage. Here’s how to assess the embroidery effectively:
Identifying The Type of Fabric
Fabric Content: Determine the type of fabric the embroidery is stitched onto. Common fabrics include cotton, linen, polyester, silk, and blends. Each fabric has its own characteristics and may require different removal techniques.
Fabric Texture: Consider the texture of the fabric, such as smooth, textured, or delicate. Rough or textured fabrics may be more forgiving during removal, while delicate fabrics require extra caution to prevent tears or distortion.
Fabric Color: Take note of the fabric’s color, as certain removal methods may cause discoloration or staining. Test any removal technique on a small, inconspicuous area of the fabric to ensure compatibility.
Examining the type of thread used
Thread Material: Identify the type of thread used in the embroidery. Common thread materials include polyester, rayon, cotton, metallic, and specialty threads. Each type of thread may react differently to removal techniques, so it’s essential to know what you’re working with.
Thread Thickness: Consider the thickness or weight of the thread used. Thicker threads may require more effort to remove, while finer threads may be more delicate and prone to breakage.
Thread Color: Take note of the thread color, especially if the embroidery contains multiple colors. Certain removal methods may affect the vibrancy or integrity of the thread colors, so it’s crucial to choose a removal technique that minimizes color distortion.
Assessing The Complexity of The Embroidery Design
Stitch Density: Evaluate the density of the stitches in the embroidery design. Designs with dense stitching may be more challenging to remove, requiring extra care and patience to avoid damaging the fabric.
Design Size: Consider the size and scale of the embroidery design. Larger designs may require more time and effort to remove, especially if they cover a significant portion of the fabric.
Complexity of Detail: Assess the complexity of the design’s details, such as intricate patterns, fine lines, or densely stitched areas. Designs with intricate details may require more precise removal techniques to preserve the integrity of the fabric and embroidery.
Preparing for Removal
Preparation is key to successful embroidery removal. Before beginning the removal process, take the time to gather the necessary tools and materials, test removal techniques on a scrap piece of fabric, and ensure your workspace is set up for efficiency and safety.
Gathering The Necessary Tools and Materials
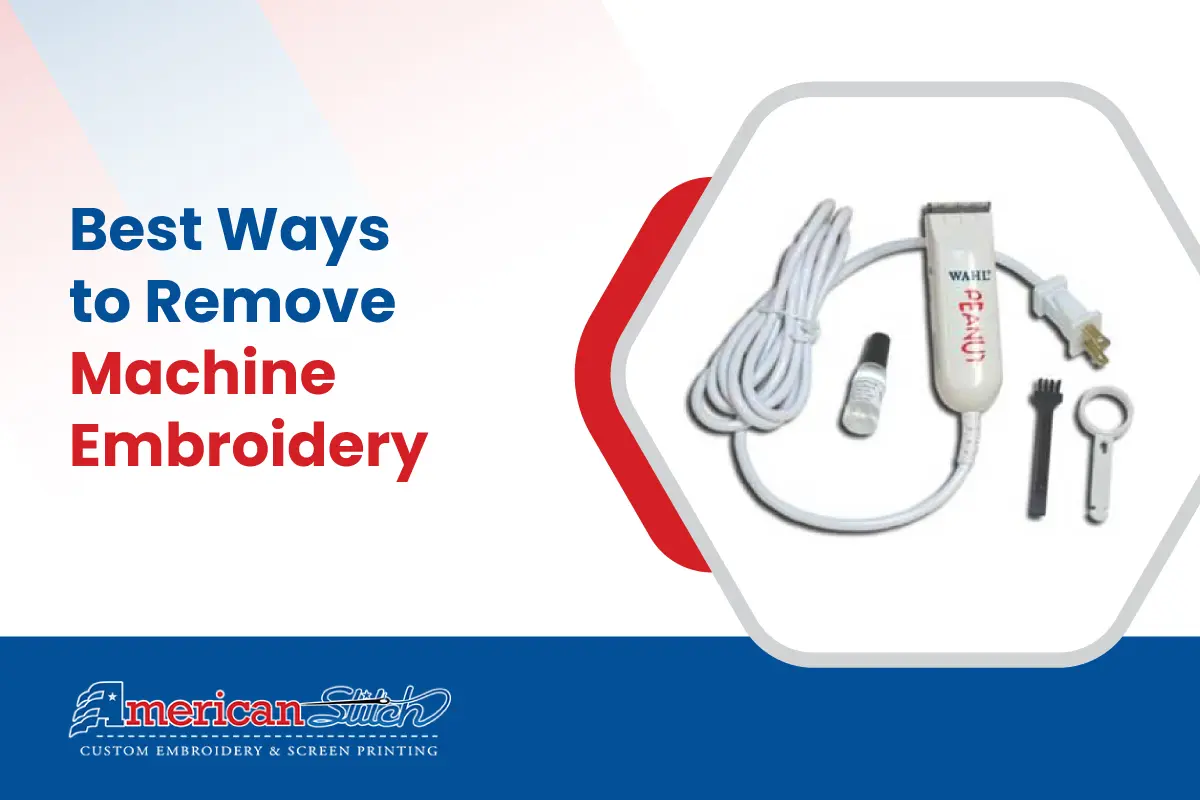
- Seam Ripper: A sharp seam ripper is essential for carefully cutting through embroidery stitches without damaging the fabric.
- Steam Iron: A steam iron can be used to soften embroidery stitches and make them easier to remove from the fabric.
- Solvent: Depending on the type of thread used, you may need a solvent such as rubbing alcohol or adhesive remover to dissolve stubborn stitches.
- Embroidery Eraser: An embroidery eraser is a specialized tool designed to remove stitches without damaging the fabric.
- Scissors: Sharp scissors may be needed to trim any loose threads or excess fabric after removal.
- Protective Gloves: Gloves can help protect your hands during the removal process, especially if working with delicate fabrics or harsh chemicals.
- Scrap Fabric: Have a scrap piece of fabric on hand to test removal techniques and ensure they won’t cause damage to the actual embroidery.
- Protective Surface: Lay down a protective surface, such as a cutting mat or old towel, to prevent damage to your workspace.
Testing Removal Techniques on a Scrap Piece of Fabric
Before attempting to remove embroidery from the actual fabric, it’s essential to test removal techniques on a scrap piece of fabric with similar characteristics. This allows you to assess the effectiveness of the techniques and determine any potential risks of damage to the fabric.
- Select a Scrap Piece of Fabric: Choose a scrap piece of fabric that is similar in composition and texture to the fabric used in the embroidery project.
- Apply Different Removal Techniques: Test different removal techniques, such as using a seam ripper, steam iron, solvent, or embroidery eraser, on the scrap fabric.
- Assess Results: Evaluate the results of each removal technique, paying attention to how easily the stitches are removed and any damage to the fabric.
- Adjust Techniques as Needed: Based on your findings, adjust your removal technique or choose a combination of techniques that yield the best results with minimal risk of damage.
Ensuring Proper Workspace Setup
Prepare your workspace to ensure a comfortable and efficient environment for embroidery removal.
- Well-Lit Area: Work in a well-lit area with ample natural or artificial light to see the embroidery stitches clearly.
- Clean Surface: Clear your workspace of clutter and ensure a clean, flat surface to work on.
- Ventilation: If using solvents or chemicals during the removal process, ensure proper ventilation to avoid inhaling fumes.
- Organized Tools: Arrange your tools and materials within easy reach, keeping them organized to streamline the removal process.
Step-by-Step Removal Process
Embroidery removal requires careful attention and precision to avoid damaging the fabric. Here’s a step-by-step guide outlining four different methods for removing machine embroidery:
Method 1: Using a Seam Ripper
- Securing the fabric: Place the fabric on a flat surface and secure it with pins or clips to prevent shifting during the removal process.
- Gently cutting the stitches: Carefully insert the tip of the seam ripper under the stitches of the embroidery, starting from the edge of the design. Use small, controlled movements to cut through the stitches without piercing the fabric.
- Removing loose threads: After cutting through the stitches, gently pull on the loose threads to remove them from the fabric. Be cautious not to pull too forcefully, as this may cause damage to the fabric.
Method 2: Using a Steam Iron
- Preparing the fabric and iron: Lay the fabric flat with the embroidered side facing down on a clean ironing board. Fill the steam iron with water and set it to the appropriate temperature for the fabric.
- Applying steam to the back of the embroidery: Hold the steam iron a few inches above the back of the embroidery, allowing the steam to penetrate the stitches. Move the iron slowly across the embroidery, focusing on areas with dense stitching.
- Slowly lifting the embroidery from the fabric: As the steam softens the stitches, use a gentle pulling motion to lift the embroidery from the fabric. Work slowly and carefully to avoid tearing or distorting the fabric.
Method 3: Using a Solvent
- Choosing the appropriate solvent: Select a solvent suitable for the type of thread used in the embroidery, such as rubbing alcohol or adhesive remover. Test the solvent on a small, inconspicuous area of the fabric to ensure compatibility.
- Applying the solvent to the back of the embroidery: Using a cotton swab or small brush, apply the solvent to the back of the embroidery, focusing on areas with stubborn stitches. Allow the solvent to penetrate the stitches for a few minutes to soften them.
- Removing the softened stitches: Once the stitches have softened, use a seam ripper or tweezers to gently lift the embroidery from the fabric. Take care not to apply too much force, as this may cause damage to the fabric.
Method 4: Using Embroidery Eraser
- Applying the eraser to the stitches: Gently rub the embroidery eraser over the stitches of the embroidery, using small circular motions. The eraser will help loosen the stitches and make them easier to remove.
- Gently rubbing to loosen the stitches: Continue to rub the eraser over the stitches until they begin to loosen and lift from the fabric. Be patient and work slowly to avoid damaging the fabric.
- Removing residue with a brush or cloth: Once the stitches have been loosened, use a soft brush or cloth to remove any remaining residue from the fabric. Take care not to rub too vigorously, as this may cause pilling or fraying.
Post-Removal Care for Machine Embroidery
After successfully removing machine embroidery, it’s essential to properly care for the fabric to ensure its longevity and integrity. Here are the necessary steps for post-removal care:
Removing Any Remaining Residue
- Inspect the Fabric: After removing the embroidery, carefully examine the fabric for any remaining residue or loose threads.
- Use a Lint Roller or Tape: Roll a lint roller over the fabric to pick up any remaining threads or residue. Alternatively, press a piece of adhesive tape onto the fabric and peel it away to lift off any stubborn residue.
- Spot Clean if Necessary: If there are any stains or residue that cannot be removed with a lint roller or tape, spot clean the fabric using a mild detergent and water. Gently dab the stained area with a clean cloth dampened with the detergent solution, then rinse with water and blot dry.
- Allow the Fabric to Air Dry: Once the fabric is clean and free of residue, allow it to air dry completely before proceeding to the next step.
Laundering or Dry Cleaning The Fabric
Check Fabric Care Instructions: Refer to the fabric care label to determine the appropriate laundering method. Some fabrics may be machine washable, while others may require dry cleaning to prevent damage.
Machine Wash if Appropriate: If the fabric is machine washable, launder it according to the manufacturer’s instructions using a gentle cycle and mild detergent. Avoid using bleach or harsh chemicals that could weaken the fabric fibers.
Dry Clean if Necessary: If the fabric is not machine washable or if you’re unsure about the proper laundering method, take it to a professional dry cleaner for safe and effective cleaning.
Follow Drying Instructions: After washing or dry cleaning, follow the fabric care instructions for drying. Some fabrics may be tumble dried on low heat, while others may need to be air dried to prevent shrinkage or distortion.
Repairing Any Damage Caused During Removal
- Assess Damage: Inspect the fabric for any damage that may have occurred during the removal process, such as tears, holes, or distortion.
- Repair Tears or Holes: If the fabric has tears or holes, repair them using a needle and thread or fabric glue. Carefully stitch or glue the damaged area back together, ensuring a secure and discreet repair.
- Press or Steam the Fabric: Use a steam iron to press or steam the fabric, if necessary, to smooth out any wrinkles or creases caused during the removal process.
- Store Fabric Properly: Once the fabric is clean and repaired, store it properly in a cool, dry place away from direct sunlight to prevent fading or discoloration.
Tips and Tricks for Success
Successfully removing machine embroidery requires careful attention to detail and patience. Here are some valuable tips and tricks to ensure a smooth and successful removal process:
Being Patient and Gentle During The Removal Process
- Take Your Time: Avoid rushing through the removal process. Take your time to carefully assess the embroidery and use gentle, deliberate movements to avoid damaging the fabric.
- Work in Small Sections: Focus on removing the embroidery one small section at a time, rather than trying to tackle the entire design at once. This allows for greater precision and reduces the risk of mistakes.
- Handle the Fabric with Care: Treat the fabric with care to avoid stretching, tearing, or distorting it during the removal process. Use a light touch when handling the fabric, especially if it’s delicate or prone to damage.
Choosing The Right Method Based on Fabric Type and Embroidery Complexity
Consider Fabric Characteristics: Choose a removal method that is suitable for the type of fabric you’re working with. Delicate fabrics may require a more gentle approach, while sturdy fabrics may tolerate more aggressive removal techniques.
Assess Embroidery Complexity: Take into account the complexity of the embroidery design when selecting a removal method. Simple designs with fewer stitches may be easier to remove, while intricate designs may require more advanced techniques.
Test Removal Techniques: Before attempting to remove the embroidery from the actual fabric, test different removal techniques on a scrap piece of fabric to determine which method works best for your specific project.
Seeking Professional Help If Unsure or Dealing With Delicate Fabrics
Consult a Professional: If you’re unsure about the best removal method to use or if you’re dealing with delicate fabrics that require special care, consider seeking advice from a professional embroiderer or textile conservator.
Professional Dry Cleaning: For delicate fabrics or intricate embroidery designs, it may be safest to take the fabric to a professional dry cleaner who has experience handling delicate textiles and removing embroidery.
Preserve the Integrity of the Fabric: Remember that preserving the integrity of the fabric is paramount. If you’re hesitant about removing the embroidery yourself, it’s better to seek professional assistance rather than risk damaging the fabric irreparably.
Conclusion
Embarking on a journey of removing machine embroidery demands attention to detail, patience, and a willingness to experiment with different techniques. As we conclude, let’s reflect on the significance of mastering this skill and preserving the integrity of your fabric projects:
Preserving the integrity of your fabric projects is paramount throughout the embroidery removal process. By taking the time to prepare properly, work diligently, and care for the fabric after removal, you can ensure that your projects maintain their quality and longevity. Remember to be patient and gentle, choose the appropriate removal method for each situation, and prioritize the preservation of the fabric’s integrity above all else. With dedication and attention to detail, you can achieve successful embroidery removal while safeguarding the beauty and craftsmanship of your projects.
As you continue your journey in the world of textile arts and crafts, may the knowledge and skills you’ve gained in removing machine embroidery empower you to tackle new challenges and bring your creative visions to life with confidence and precision. Happy crafting!