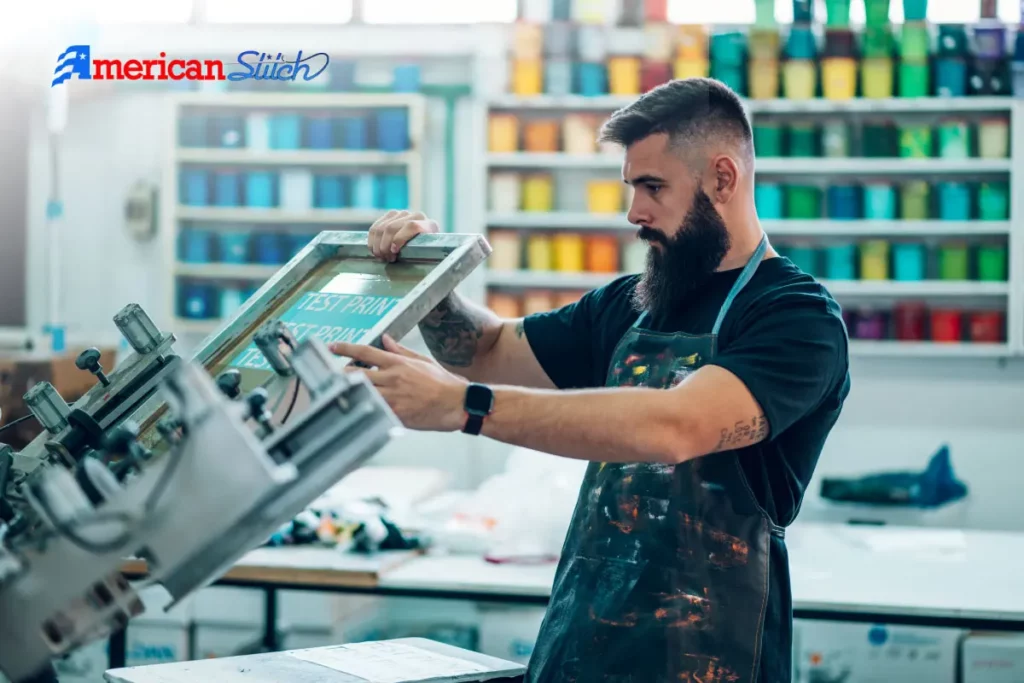
Screen printing with white ink can be both a rewarding and challenging endeavor for printers. While printing dark inks on white garments is relatively straightforward, achieving crisp and vibrant white prints on dark-colored shirts demands precision and expertise.
In this comprehensive guide, we’ll delve into the intricacies of screen printing with white ink, covering everything from understanding the nature of white ink to practical tips and techniques for achieving outstanding results.
Contents
Understanding White Ink
White inks are notably thicker compared to other inks, which presents the first challenge in screen printing with white ink. The reason behind this thickness is the use of larger particles in white inks. When you force ink through a thin mesh screen during the screen printing process, the viscosity of white ink makes it more challenging to achieve uniform application and can lead to various issues.
Types of White Inks
Screen printers have access to different types of white plastisol ink, each tailored for specific applications:
1. Low-Bleed White Inks
Low-bleed white inks are designed to prevent ink from bleeding through the fabric, making them ideal for printing on tri-blends and 50/50 cotton/poly blend garments. These inks adhere only to the garment’s surface, avoiding leaks through the fibers.
2. Cotton White Inks
Specially formulated for 100% cotton garments, cotton white inks offer a smooth and creamy consistency. They are suitable for high-mesh screens but typically lack bleed resistance.
3. Polyester and Nylon White Inks
White inks for polyester (e.g., athletic garments) and nylon substrates (e.g., backpacks) are available. Polyester inks provide the highest bleed resistance but require low mesh counts, while nylon inks offer a glossy finish but lack bleed resistance.
Proven Techniques for Screen Printing with White Ink
1. Follow Manufacturer’s Directions
Always read and adhere to the manufacturer’s instructions for the white ink you’re using. Manufacturers like Rutland provide valuable insights into ideal garments, techniques, and conditions for achieving high-quality results with their ink.
2. Mesh Count Matters
Experiment with different mesh counts to find the one that delivers the best print with white ink. Ensure that your chosen mesh count aligns with your artwork and the garment you’re printing on.
3. Optimize Emulsion Application and Exposure
Pay close attention to emulsion application and exposure time. Properly coated screens and post-exposure are essential for clean ink deposits and sharp lines.
4. Mix White Ink Thoroughly
White ink’s thickness requires thorough mixing to improve flow and printability. Invest in a mixing blade and drill or a screen printing ink mixing machine. Mix the ink for 1-3 minutes until it becomes smooth, creamy, and flowing. Stir it each time before use.
5. Utilize Additives
Experiment with different additives to modify the consistency and quality of your white ink. Don’t hesitate to use additives to achieve the desired characteristics. For instance, a small amount of Reducer can be effective in improving white ink’s flow.
6. Warm Platen for Easier Printing
Preheat your flash unit and warm your platens before printing. This added heat helps reduce the ink’s viscosity, making it easier to work with.
7. Choose the Right Squeegee Durometer
The choice of squeegee durometer affects ink passage through the screen mesh. Experiment with different durometers to achieve the desired ink deposit – harder durometers lay down less ink, while softer ones lay down more.
8. Maintain Correct Off-Contact
Ensure proper off-contact between the screen and the substrate, typically about one nickel’s thickness over the shirt. Correct off-contact prevents ink from peeling off the garment, resulting in a smoother print.
9. Consider Smoothing Screens
To improve the feel of your prints, use a smoothing screen. This technique involves using a blank screen and a roller or squeegee to go over the print before curing.
The Fundamentals of Achieving Outstanding White Prints
To excel in white screen printing, mastering the fundamentals is crucial:
- Use a screen with the correct mesh count.
- Apply and dry emulsion correctly, with the right emulsion over mesh.
- Maintain adequate off-contact.
- Experiment with additives to modify ink characteristics.
- Select the appropriate white ink for the substrate.
- Gain knowledge and control over the essential variables in your shop.
By understanding and implementing these techniques, you can achieve exceptional results when screen printing with white ink. With dedication and practice, you’ll have the skills needed to produce stunning white prints that meet the highest standards of quality and craftsmanship.
Why White Ink Matters in Screen Printing
White ink is a versatile tool in the screen printing arsenal. It allows you to print on dark and colored substrates, creating striking designs that pop. In this comprehensive guide, we’ll walk you through the process of mastering screen printing with white ink, from the basics to advanced techniques.
Getting Started
Understanding the Basics of Screen Printing
Screen printing is a versatile method of transferring ink onto various substrates through a mesh screen. The process involves creating a stencil on the screen, which allows ink to pass through onto the chosen material. Here are the fundamental steps of screen printing:
- Stencil Creation: A design or image is transferred onto a mesh screen using a light-sensitive emulsion. Areas that need to be printed are left open, creating a stencil.
- Ink Application: Ink is applied to the top of the screen.
- Printing: A squeegee is used to push the ink through the open areas of the stencil onto the substrate below.
- Curing: The printed material is subjected to heat or UV light to cure and set the ink permanently.
Choosing the Right Equipment
Selecting the appropriate screen printing equipment is crucial for achieving high-quality prints. Here are key factors to consider:
- Screen: Choose screens with the right mesh count for your design. Lower mesh counts are suitable for thicker inks, while higher counts are ideal for finer details.
- Squeegee: Squeegees come in various shapes and hardness levels. The choice depends on the type of ink and substrate.
- Ink: Different inks work better on specific materials. For white ink printing, ensure you choose an ink designed for the purpose.
- Press: Select a press that suits your production needs. Manual presses are suitable for small runs, while automatic presses are better for larger quantities.
- Exposure Unit: An exposure unit is essential for creating the screen stencil. Ensure it provides consistent and precise exposure.
Selecting the Perfect White Ink
When it comes to white ink, not all products are created equal. Consider these factors for choosing the best white ink:
- Opacity: White ink should provide excellent coverage, especially when printing on dark or colored substrates.
- Consistency: Opt for an ink with a stable and easy-to-work-with consistency to prevent clogs and ensure smooth printing.
- Curing Method: Check if the ink requires specific curing methods, such as heat or UV exposure.
- Durability: Consider the durability and washability of the ink, especially for garments.
- Compatibility: Ensure the white ink is compatible with your screen printing setup and the substrates you plan to print on.
Preparing Your Workspace
Setting Up Your Screen Printing Studio
Creating an efficient and organized workspace is crucial for successful screen printing. Follow these steps to set up your studio for maximum productivity:
- Space: Choose a well-ventilated area with ample space for your equipment and materials. Ensure good lighting for accurate color matching and quality control.
- Workstation: Set up sturdy tables or workbenches for your screen printing press and other equipment. Ensure they are level and stable.
- Storage: Organize your supplies with shelves, cabinets, or storage bins. Keep inks, screens, squeegees, and other tools easily accessible.
- Screen Drying Area: Dedicate a space for drying screens after cleaning and coating with emulsion. Ensure proper ventilation in this area.
- Cleanliness: Maintain a clean and clutter-free environment. Regularly clean surfaces and equipment to prevent ink contamination.
- Workflow: Plan the workflow to minimize unnecessary movement between stations. This improves efficiency and reduces the risk of accidents.
- Ergonomics: Consider the ergonomics of your workspace. Ensure your printing press and work surfaces are at a comfortable height to prevent strain during long printing sessions.
Safety First: Proper Ventilation and Protective Gear
Safety is paramount when working with white ink and chemicals. Here’s how to protect yourself and maintain a safe printing environment:
- Ventilation: Install proper ventilation systems like exhaust fans or air purifiers to remove fumes and ensure a well-ventilated space.
- Protective Gear: Wear appropriate protective gear, including gloves, goggles, respirators, and aprons, as needed when handling chemicals and inks.
- Chemical Storage: Store chemicals in well-marked, sealed containers away from direct sunlight and heat sources. Follow safety data sheet (SDS) guidelines.
- Emergency Equipment: Have fire extinguishers and first-aid kits readily available in case of emergencies.
- Training: Educate yourself and your team about the safe handling of chemicals and the use of protective gear.
Screen Preparation and Mesh Selection
Properly preparing your screens and selecting the right mesh count are critical for achieving high-quality prints. Follow these best practices:
- Screen Cleaning: Ensure screens are free from dust, dirt, and old ink residues before starting a new job. Use screen cleaners and degreasers.
- Emulsion Coating: Apply emulsion evenly to both sides of the screen. Use a scoop coater for consistent results.
- Drying: Allow screens to dry in a darkroom with controlled humidity. Ensure they are completely dry before exposing.
- Exposure: Use proper exposure units with the right exposure time for your emulsion type. Ensure good contact between the positive film and the screen.
- Mesh Selection: Choose the appropriate mesh count for your design. Lower mesh counts for bold prints and higher counts for fine details.
Design and Artwork
Creating Artwork for White Ink Printing
Designing for white ink printing offers unique opportunities and challenges. To achieve stunning results, follow these tips:
- Transparency: Utilize transparency in your design. White ink can be used to create subtle overlays or unique effects by adjusting opacity.
- Spot Colors: When designing, use spot colors for white ink areas. In software like Adobe Illustrator, select ‘Spot Color’ in the ‘Color Type’ dropdown and name the swatch ‘White’ for clear identification[1].
- Vector Artwork: Create your artwork as vector graphics for crisp, clean lines and scalability.
- Overprinting: Experiment with overprinting white ink on colored backgrounds to create interesting textures and tones.
- Embrace Negative Space: Consider the use of negative space in your design. Leaving areas unprinted with white ink can add depth and contrast.
- Test Prints: Always conduct test prints to fine-tune your design. Adjustments may be necessary to achieve the desired look.
Choosing the Right Colors and Combinations
Selecting the right colors to complement white ink is crucial for impactful designs:
- Contrasting Colors: Opt for colors that contrast with white ink. Bold, dark colors like deep blues and blacks can create striking effects.
- Metallics: Experiment with metallic inks combined with white for a touch of elegance and shimmer.
- Pastels: Soft pastel shades can create a delicate and dreamy look when paired with white ink.
- Gradients: Gradient color transitions in combination with white ink can produce captivating visual effects.
- Complementary Colors: Explore color theory and use complementary colors that enhance each other’s vibrancy.
- Minimalism: Sometimes, less is more. A minimalist design with white ink accents can be remarkably impactful.
Screen Exposure and Preparation
Emulsion Coating and Drying
Achieving sharp prints in screen printing starts with proper emulsion coating and drying. Follow these steps for success:
- Cleanliness: Ensure your screen is clean and free from any residue or dust before starting the coating process. A clean screen promotes even emulsion application.
- Emulsion Mixing: Follow manufacturer guidelines for mixing emulsion. Use distilled water for mixing, and stir thoroughly to achieve a consistent, lump-free mixture.
- Coating Technique: Use a scoop coater for consistent emulsion application. Apply emulsion evenly on both sides of the screen, ensuring complete coverage.
- Coating Thickness: The thickness of emulsion can impact the quality of your stencil. Check the emulsion manufacturer’s recommendations for the optimal coating thickness.
- Drying: Proper drying is crucial. Emulsion must be completely dry before exposure to prevent issues like underexposure. Emulsion drying times can vary depending on factors like coating thickness and humidity. Using fans in a well-ventilated area can speed up drying.
- Storage: Store screens in a dark, dry environment to prevent premature exposure and contamination
Exposing Your Screens with Precision
Achieving accurate results in screen exposure is essential for producing high-quality prints. Here’s how to ensure precision:
- Artwork Preparation: Prepare your artwork with the desired level of detail and resolution. High-quality films or digital positives are crucial for accurate exposures.
- Screen Placement: Ensure your screen is correctly positioned in the exposure unit to avoid distortion or misalignment.
- Exposure Time: Use a calibrated exposure unit and follow emulsion manufacturer recommendations for exposure times. Test exposure times to find the optimal duration for your setup.
- Stencil Quality: After exposure, rinse the screen gently to develop the stencil. Check for crisp edges and well-defined details. If needed, adjust exposure times or emulsion thickness.
- Lighting Conditions: Handle screens in a darkroom with safe lighting to prevent premature exposure.
- Exposure Test: Regularly perform exposure tests to maintain consistent results and adjust exposure times as needed.
Printing with White Ink
Ink Mixing and Consistency
Achieving the right ink consistency is vital for smooth white ink printing. Start by following the manufacturer’s guidelines for mixing white ink with any necessary additives for desired viscosity and opacity. Consistency ensures even coverage and prevents clogging.
Printing Techniques and Tips
Mastering white ink printing requires finesse. Here are some key techniques and tips to keep in mind:
- Use a proper squeegee angle for consistent pressure and ink deposition.
- Maintain consistent pressure while printing to avoid streaks.
- Print with a firm, controlled stroke.
- Adjust off-contact distance to prevent ink smudging.
- Experiment with different mesh counts for various effects.
Troubleshooting and Equipment Maintenance
Troubleshooting Common White Ink Printing Issues
White ink printing can sometimes be tricky, but with the right troubleshooting techniques, you can overcome common challenges:
- Ink Bleeding: If white ink bleeds into other colors, adjust the ink density settings in your printer’s software. You may also need to increase drying time between print layers to prevent bleeding.
- Rough Edges: Rough edges on your prints can be caused by improper curing. Ensure proper curing temperatures and times according to the ink manufacturer’s recommendations. Consider using a heat press to improve curing results.
- Clogging: White ink clogs can occur, affecting print quality. Regularly maintain your printer’s white ink management system (WIMS) by following the manufacturer’s guidelines. This may involve manual cleanings or ink circulation.
- Sedimentation: Sedimentation can lead to inconsistent ink flow. Prevent this by regularly agitating the ink tanks and ensuring they are stored properly.
- Low Opacity: If white ink appears transparent, try increasing the number of print passes or adjusting color profiles to enhance opacity.
- Printhead Issues: Check your printheads for clogs or misalignments. Follow manufacturer instructions for printhead maintenance.
Equipment Maintenance for Consistent Results
Maintaining your screen printing equipment is crucial for achieving consistent results:
- Screen Care: Clean screens thoroughly after each use to prevent ink buildup. Replace damaged or worn screens promptly to maintain print quality.
- Squeegee Maintenance: Regularly inspect and clean squeegees. Replace worn or damaged squeegee blades to ensure even ink application.
- Ink System Maintenance: Clean ink lines and tanks to prevent contamination and clogs. Perform regular maintenance on ink circulation systems, if applicable.
- Dryer Maintenance: Keep your drying unit clean and ensure it operates at the right temperature and speed. Regularly clean dryer vents to prevent overheating.
- Press Maintenance: Lubricate press components as recommended by the manufacturer. Check for loose bolts or misalignments that may affect registration.
Curing and Drying Methods for White Ink
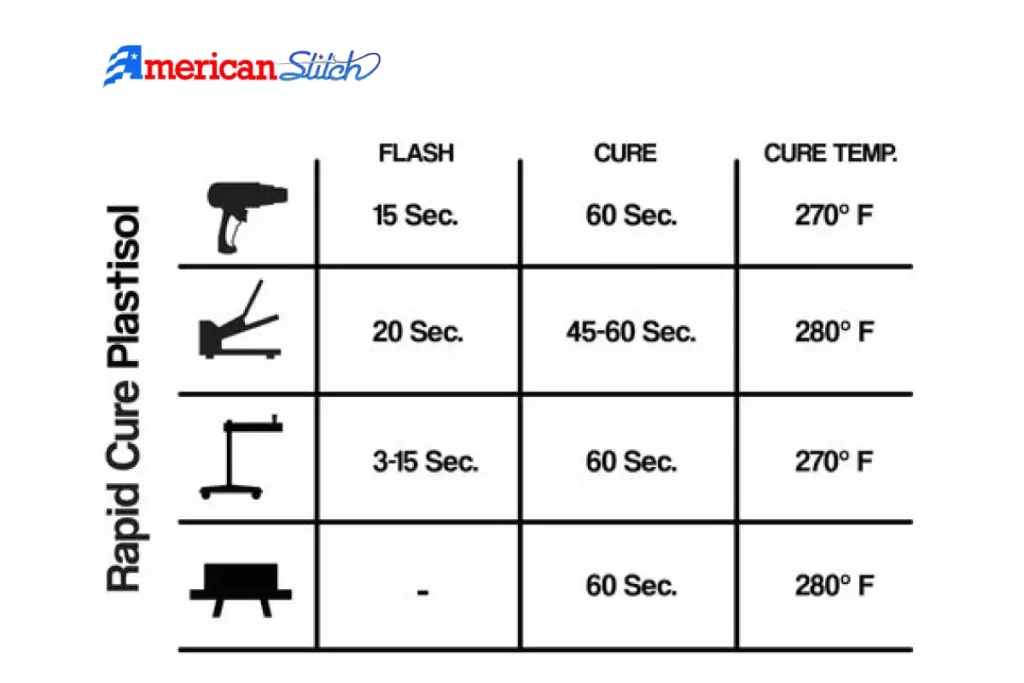
Proper Curing Methods for White Ink: Curing white ink is essential for ensuring the durability and colorfastness of your prints. Here are some methods to consider:
- Heat Press: Using a heat press is a popular method for curing white ink. Place the printed garment under the heat press and apply even heat and pressure for the recommended duration. This method is effective for small-scale printing.
- Conveyor Dryers: Conveyor dryers are ideal for larger production runs. They offer consistent and controlled curing temperatures as garments pass through a heated conveyor belt. This ensures thorough curing of the ink.
- Flash Curing: For spot curing or speeding up the drying process, a flash dryer can be used. It provides intense heat to specific areas, allowing for faster drying without affecting other parts of the print.
- Infrared (IR) Dryers: IR dryers emit infrared radiation to cure ink. They are suitable for various substrates and are energy-efficient.
- UV Curing: UV curing uses ultraviolet light to instantly cure ink. While less common in garment printing, it’s highly effective for some specialty applications.
Drying and Curing Troubleshooting: If you encounter issues with curing, consider these troubleshooting tips:
- Temperature and Time: Ensure that your curing equipment is set to the correct temperature and curing duration as recommended by the ink manufacturer.
- Ink Thickness: Thick layers of white ink may require longer curing times. Adjust the ink deposit or consider multiple curing passes.
- Testing: Perform wash tests or adhesion tests to ensure proper curing. If prints fail these tests, increase curing time or temperature.
- Garment Type: Different fabrics may require variations in curing parameters. Test on a scrap piece of fabric to determine the optimal settings.
- Ink Quality: Ensure you’re using high-quality ink that’s suitable for the curing method you’re using.
- Equipment Maintenance: Regularly clean and maintain your curing equipment to ensure consistent performance.
Proper curing is crucial for achieving long-lasting and vibrant prints. Experiment with different methods and follow manufacturer guidelines to find the best curing process for your specific needs.
Exploring Specialty Inks and Creative Techniques for Unique Effects
Adding Texture and Depth with Specialty Inks
Elevate your white ink prints by embracing specialty inks that introduce captivating textures and depth. Two noteworthy options are:
- Puff Ink: Puff ink is a non-phthalate plastisol ink base designed to create raised, textured effects. When cured, it swells and expands, resulting in a three-dimensional, tactile finish. This ink adds a playful and eye-catching element to your designs.
- High-Density Ink: High-density ink, also known as HD ink, is a thick, opaque ink that offers a raised, bold, and substantial appearance. It’s perfect for achieving a bold and impactful design with pronounced textures and edges.
Foil Printing and Other Creative Techniques
Explore innovative techniques like foil printing to infuse elegance and shine into your white ink prints:
- Foil Printing: Foil printing involves applying a thin layer of metallic foil to selected areas of your design. When properly adhered, it creates a stunning metallic sheen that contrasts beautifully with white ink. This technique is ideal for adding a touch of sophistication and luxury to your prints.
- Glow-in-the-Dark Ink: Consider incorporating glow-in-the-dark ink for designs that illuminate in low light. It’s a captivating way to make your prints stand out, especially for night-themed or novelty designs.
- Glitter Ink: Glitter ink includes tiny reflective particles that sparkle and catch the light. It’s an excellent choice for creating glamorous and attention-grabbing prints.
By exploring these specialty inks and creative techniques, you can transform your white ink prints into visually striking and memorable pieces of art.
Conclusion
mastering screen printing with white ink opens up a world of creative possibilities. From creating unique designs on dark fabrics to adding texture and depth, white ink can take your screen printing game to the next level. By understanding the basics, perfecting your technique, and staying up-to-date with industry trends, you’ll be well on your way to becoming a white ink screen printing master.
Frequently Asked Questions
Can I use any white ink for screen printing?
While there are many white inks on the market, not all are suitable for screen printing. It’s essential to choose a white ink specifically designed for this purpose to achieve the best results.
Do I need special equipment for white ink printing?
White ink screen printing may require additional equipment, such as a flash cure unit, to properly cure the ink. It’s important to invest in the right tools for the job.
How can I troubleshoot common printing issues with white ink?
Common issues like ink bleeding or poor opacity can be resolved with adjustments to ink consistency, screen tension, and printing techniques. Our troubleshooting section provides detailed solutions.
Is white ink screen printing environmentally friendly?
You can adopt eco-friendly practices in white ink screen printing, such as using sustainable inks and recycling screens. We cover these practices in our article.
What are some emerging trends in white ink screen printing?
Stay ahead of the game by exploring emerging trends in white ink screen printing, from innovative ink formulations to creative finishes. Our article delves into the latest developments in the field.